


How to Test Abstract PHP Classes With PHPUnit
How do you test abstract classes in PHP? Find out how to test them in this post by using PHPUnit’s getMockForAbstractClass method.
Debugging requests can be a time-consuming process. However, there’s a tool that makes doing so a lot simpler. It’s called Postman. In this tutorial, I step you through its core features and show you how to use them.
Are you developing APIs and want a GUI-based tool to assist you in developing them? Are you looking for a simple tool — one that’s freely available — for sending custom requests and viewing the response details? If so, there are several options?
However, of those options, only a few — perhaps only one — has:
The app that I’m referring to is Postman. It’s an app that I’ve been using increasingly over the last 2 - 3 years. To quote the app’s site:
Postman is a collaboration platform for API development. Postman’s features simplify each step of building an API and streamline collaboration so you can create better APIs—faster.
It can:
Now, there’s a lot more functionality than I have covered here. Make sure to check out the app’s site, where they provide the information in detail.
If it sounds like an app that could make your development life more comfortable, then you’re going to enjoy this post. In it, I’m going to step you through how to get started with it and go over the basic functionality that you’ll likely use on a day to day basis.
I’ll assume in this tutorial, that you’ve already installed it. If not, then grab a copy for your operating system of choice, install it, start it, and get ready to go.
Now that the app’s started have a look at the main window, so that you get yourself acquainted with it. On the left is the list of requests that have been previously made. Naturally, if this is your first time using it, it will be empty. In the middle is where you can make requests.
Like most browsers and file explorers, it features a tab-enabled interface, so that you can effectively have multiple projects within the one window. Within the request window, you can:
The final two options aren’t covered in this post.
In this post, I’m working with a simple application that I’ve been working on which converts CSV files between standard formats. At the moment, it only converts from ING DiBa and Consors bank formats to YNAB. I’ll date a post on that project later in the year.
It’s a simple application where you can upload a CSV file and specify the bank. After the form is processed, it returns the YNAB equivalent of the uploaded file’s contents.
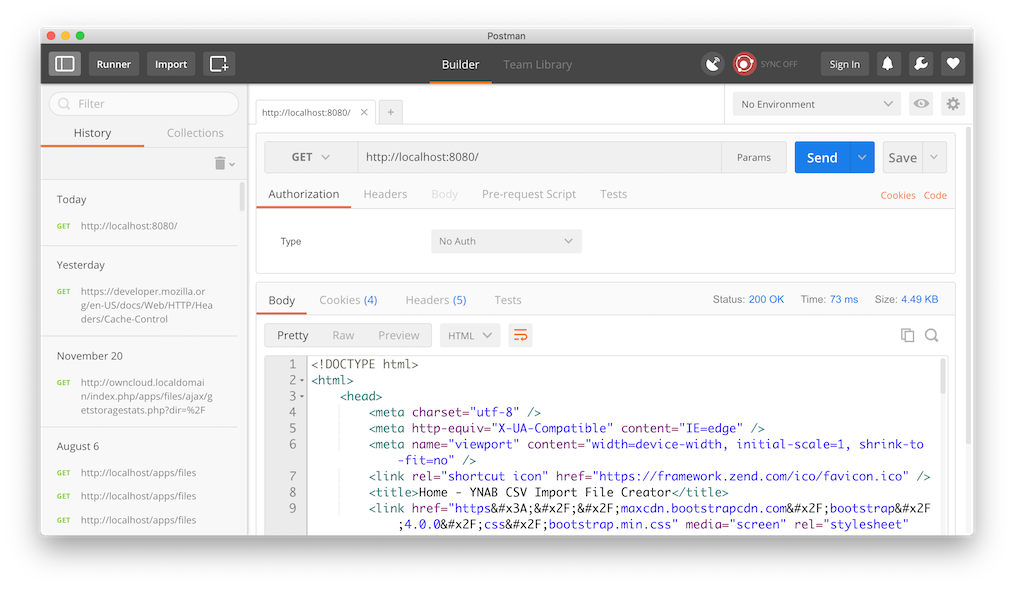
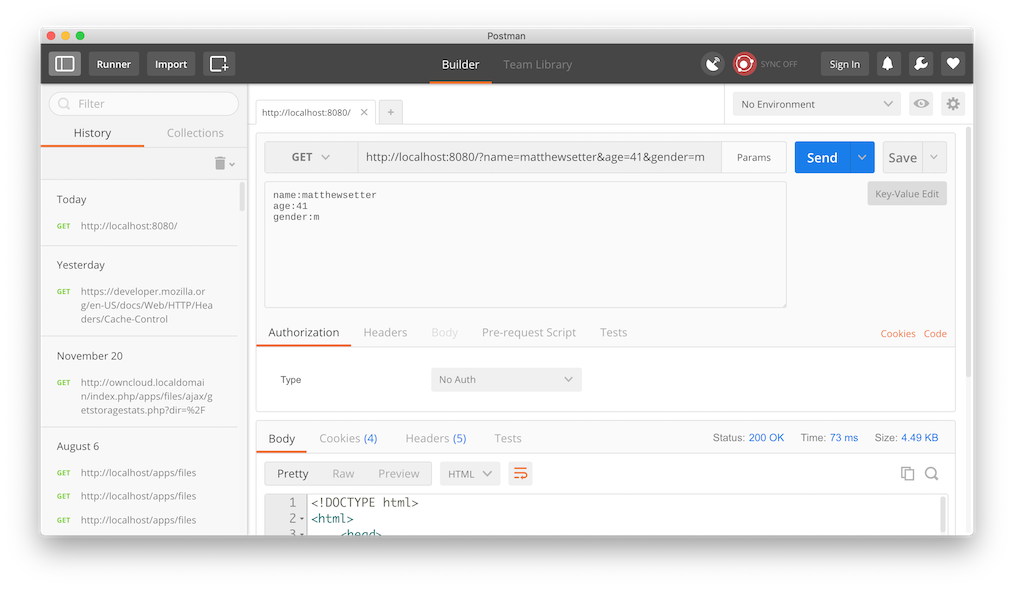
In the image above, you can see that I’ve made a GET request, with no query or extra parameters to http://localhost:8080. I’m using PHP’s built-in webserver to run the app locally on port 8080. I’ve not set any authorization or other headers, nor filled in a request body.
In the lower half of the right-hand side, you can see the raw HTML response from the request, with some syntax highlighting and formatting so that it’s easier to read. Also, you can see that, of the response:
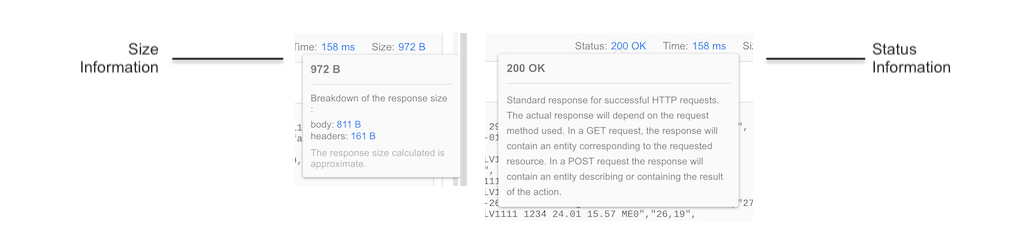
If you click on either the response’s size or status code, a popup window appears, which you can see below, which display more information about both values.
Now that’s how to send a basic request. Later on, we’ll see how to send a POST request. However, feel free to change GET to one of the other HTTP methods and experiment; including PUT, PATCH, DELETE, COPY, HEAD, OPTIONS, AND VIEW.
Now that we have a response, you can see above it three buttons (Pretty, Raw, and Preview) and a dropdown (set to HTML). Pretty is the default view, as it, often, makes the response the easiest for a person to read. However, if one of the other two is preferable, then use that instead.
The drop-down has 5 options: JSON, XML, HTML, Text, and Auto. It changes based on the content supplied.
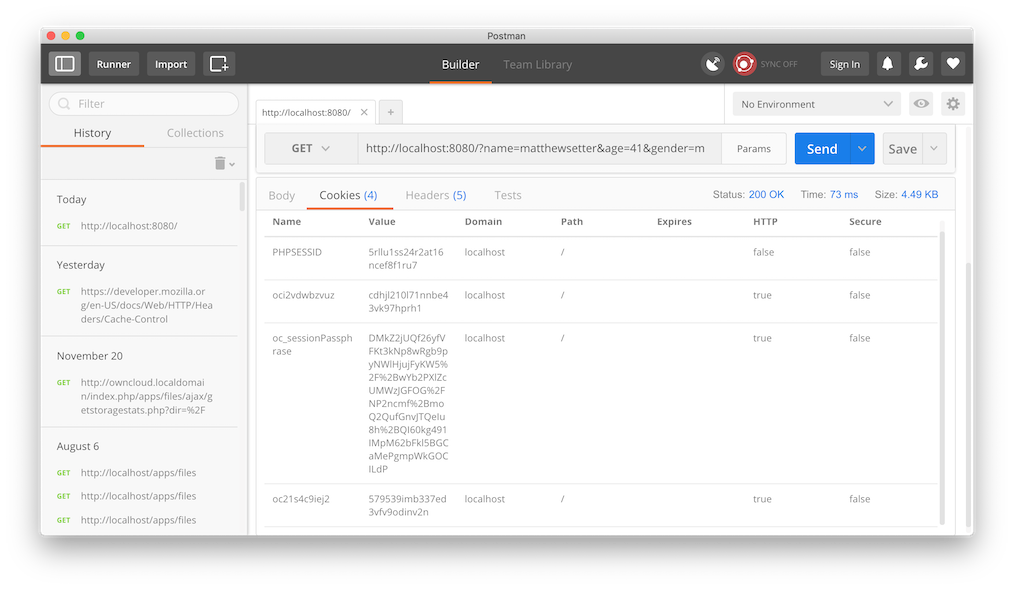
Now that we’ve seen the response click on the Cookies and Headers tabs and see what’s there. In the case of my test application, under Cookies, four Cookies are set.
And under Headers, five Headers are set.
These are the standard ones that PHP’s built-in webserver returns (connection, content-type, date, host, and x-powered-by).

In addition to sending basic requests, you can, as you’d expect, add query parameters to the request. This can be done in one of three ways:
The latter two, through Postman’s GUI, are likely less error-prone and more efficient. To do so, click on the Params button, located after the request URI field and before the Send button. It opens a form where you can add parameter keys and values one at a time, which you can see below.
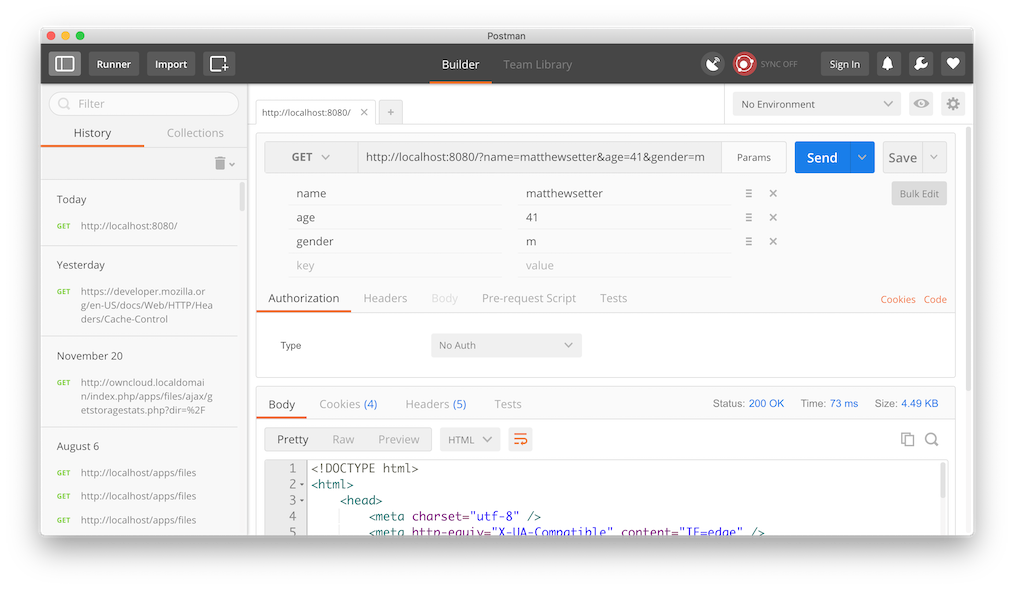
Every time you add one, the option to add a subsequent one appears. If the parameters need to be in a particular order, you can move them around by clicking and dragging the icon to the right of the value field.
Alternatively, if you want to add query parameters in bulk, you can click Bulk Edit under the Save button. That hides the individual parameter fields, replacing them with a bulk edit text field, which you can see below.
A colon separates query parameter keys and values, and a new line separates parameters. Regardless of the approach that you take, as you add each query parameter, you’ll see the URL bar update to reflect the changes made.
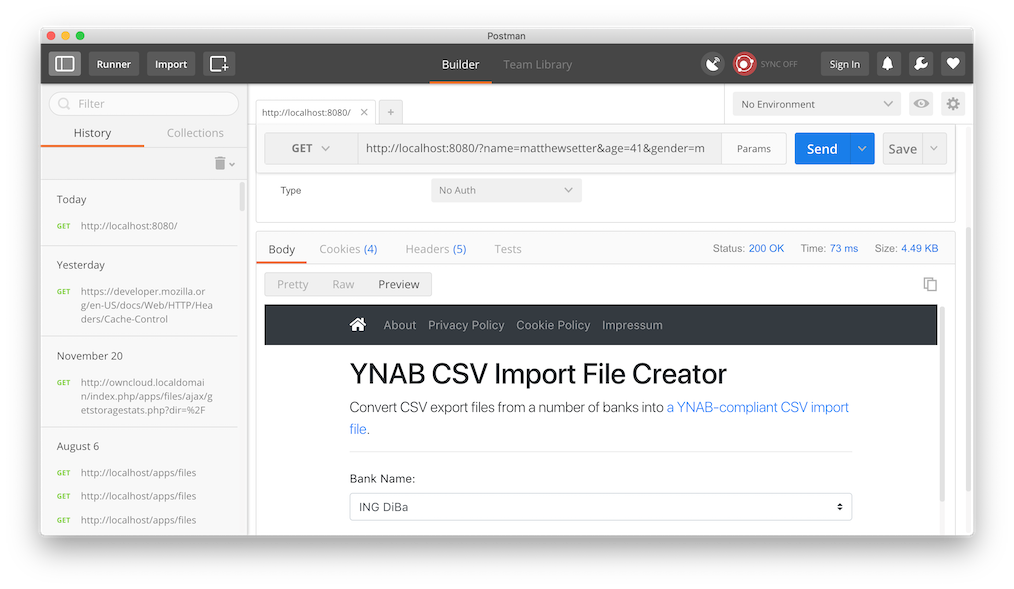
If you look in the image below, you’ll see the same response as before, but this time with the response body displayed in the Preview window.
Now that we’ve played around with basic requests let’s see how to submit a form.
To do that, we’re going to change our configuration a little.
First, we’ll change the request method to POST.
Then, we’ll click the Body tab, underneath the URI field and ensure that form-data is selected for the form encoding type.
After that, add two form post parameters: dataFile and bankName.
For dataFile, in the dropdown to the right of the field’s value, change Text to File, and choose a file to upload.
For bankName, set the value to ingdiba.
With those changes made, click Send.
The response, if successful, is a small CSV file, which you can see in the screenshot below.
While we’re here, have a look at the options available when setting enctype to x-www-form-urlencoded, raw, and binary.
Now, it’s time for one last point to cover, and that will wind up this brief introduction to Postman. We’re going to look at Authorization headers. Postman supports sending six, (in addition to no Authorization headers), these are:
In this example, I’m only going to cover Basic Auth. However, I may well cover the rest in a later post. Let me know if that’s something you’d find of benefit.
Under the request method, click the Authorization tab. Then, in the dropdown next to Type, select Basic Auth. Once you do that, you’ll see the option to enter a username and password appear. Once you do that and click Update Request, if you click the Headers tab, you’ll see that the Authorization header’s been automatically created for you. There is no need to generate the value on your own.
And that’s a basic introduction to Postman. I hope you see that it’s an excellent tool for developing APIs and performing simple request debugging and validation
It’s a great tool and costs nothing to get started with. If the free version doesn’t cover all your needs, you can subscribe to the Pro or Enterprise plans. But that’s a decision that I’ll leave up to you.
Are you a Postman user? What’s your experience of it been like? I’d love to hear about it in the comments.
Related Posts
How do you test abstract classes in PHP? Find out how to test them in this post by using PHPUnit’s getMockForAbstractClass method.

PhpStorm offers so much functionality. From syntax highlighting to Docker integration, it’s an extremely comprehensive tool. However, have you ever thought of using it to run your unit tests? In this article, I step you through running tests, from an entire suite to an individual test.

If you love using data providers in PHPUnit, but find defining them verbose (and potentially buggy) then you’ll love the attribute-based approach in PHPUnit 10. Learn the essentials in this short post.

Substitutability or the Liskov Substitution Principle (LSP) is a concept that I’ve tried to adhere to for some years when writing code. It’s beneficial for many reasons, but particularly when testing, as it can indirectly force you to write code that is more testable. Recently, I’ve started appreciating how it works in Go, and will step through how in this short article.
Please consider buying me a coffee. It really helps me to keep producing new tutorials.
Join the discussion
comments powered by Disqus