When you’re reviewing generated HTML content, broken link’s are the last thing you want. However, given the massive amount of documentation in modern projects, manually hunting for broken links isn’t practical. So how do you deal with this problem?
Well, in the second part of the series, I’m introducing you to NPM’s Broken Link Checker; a tool that finds broken links for you and saves your sanity. Don’t miss part one of the series which covered MarkdownLint.
In my current role as documentation lead at ownCloud.
I’m responsible for the three core manuals, along with five supplemental manuals.
These cover all aspects of installing, configuring, updating, and hardening ownCloud, as well as how to use it, and develop apps for it.
In addition, most of these manuals have three versions actively available at any one time; there’s the latest version, plus two prior versions.
As you can imagine, there’s no way that one person could keep track of all the links, whether internal or external in a documentation base so large.
So good luck trying to ensure that every link works — before a customer or client does.
As a result I, naturally, started looking for an automatable solution, something that can run at build time, in a Git commit hook, or manually, as and when needed.
As is so often the case, Google (or another search engine, such as DuckDuckGo) was my friend, as I came across NPM’s Broken Link Checker (blc).
On reading through Broken Link Checker’s home page, it sure looked like the right tool for the job.
If you’ve never used it before, here’s a list of the functionality that it offers:
- Stream-parses local and remote HTML pages
- Concurrently checks multiple links
- Supports various HTML elements/attributes, not just
<a href>
- Supports redirects, absolute URLs, relative URLs and
<base>
- Honors robot exclusions
- Provides detailed information about each link (HTTP and HTML)
- URL keyword filtering with wildcards
- Pause/Resume at any time
While I’ve not experimented with all of that functionality, I’ve been using quite a bit of it — and am very happy with it.
If you like what you see, let’s install it, so that we can begin using it.
How To Install It
Assuming that you have NPM installed already, it’s a relatively trivial task to install Broken Link Checker; whether locally or globally.
Since I want it available for all my projects (and potentially for random website scans), I elected to install it globally, as in the example below.
# Remove the `-g` option if you want it installed locally.
npm install broken-link-checker -g
How To Use It
With it installed, it’s time to use it.
For that, you have to have something for it to scan.
So that the scans would be as quick as possible, I used NPM serve to serve up the ownCloud documentation locally, on port 5000, ready for review.
For my first attempt, I used the command below to recursively (-r) scan both internal and external links in the latest copy of the documentation and to order (-o) the links in the output.
Doing so ensures that the output is easy to parse, whether visually or with a subsequent command, such as grep or awk.
blc http://localhost:5000 -ro
Given the number of pages, the process took a little while to complete.
However, here’s a small sample of the output that the command produced.
Getting links from: http://localhost:5000/
├───OK─── http://localhost:5000/assets
├───OK─── http://localhost:5000/branded_clients
├───OK─── http://localhost:5000/desktop
├───OK─── http://localhost:5000/server
├───OK─── http://localhost:5000/404.html
├───OK─── http://localhost:5000/sitemap-branded_clients.xml
├───OK─── http://localhost:5000/sitemap-desktop.xml
├───OK─── http://localhost:5000/sitemap-server.xml
└───OK─── http://localhost:5000/sitemap.xml
Finished! 11 links found. 2 excluded. 0 broken.

Getting links from: http://localhost:5000/assets
├───OK─── http://localhost:5000/assets/css
├───OK─── http://localhost:5000/assets/font
├───OK─── http://localhost:5000/assets/img
└───OK─── http://localhost:5000/assets/js
Finished! 8 links found. 4 excluded. 0 broken.
You can see that the output first lists the page that is being scanned.
It then lists all of the links found within that page preceded by either ├───OK───, or ├─BROKEN─.
It then displays a summary of:
- The total number of links found on the page.
- The links that weren’t scanned (excluded).
- The links that were broken.
What’s especially handy is that the output is in colour.
This provides additional assistance to help you know at a glance if it’s found anything amiss.
When the report completes, you’ll see a final report summary.
It lists some key metrics; these are:
- The total number of links found, excluded, and broken.
- The time to scan the site.
Here’s an example from the report that I just ran.
Finished! 78796 links found. 76857 excluded. 368 broken.
Elapsed time: 15 minutes, 47 seconds
What Is Considered a Broken Link
There is a range of reasons that Broken Link Checker reports a link as being broken.
These (I’ve found) most commonly include:
| Status Code |
Reason |
HTTP_404 |
An HTTP 404/Not Found status code |
HTTP_504 |
An HTTP 504/Gateway Timeout Error |
BLC_INVALID |
An Invalid link, which is usually triggered by using the file protocol |
ERRNO_ECONNRESET |
A connection error, such as the other side of the TCP conversation abruptly closed its end of the connection |
BLC_UNKNOWN |
Unknown |
There’s another kind of error reported; the Expected type error.
Broken Link Checker expects to scan text/html content, so if it scans anything else, it reports this error, as in the example below:
Getting links from: http://localhost:5000/assets/js/vendor/lunr.js
Error: Expected type "text/html" but got "application/javascript; charset=UTF-8"
Only Check Internal Or External Links
As you can imagine, if I let Broken Link Checker loose on the entire documentation, or you let it loose on equally as much content, then it’s going to take quite some time to complete its analysis.
So it’s likely that we’ll want to tailor the analysis, by limiting the search to either internal or external links.
To do this, we’ll need to pass either:
--exclude-external or -e to check internal links.--exclude-internal or -i to check external links.
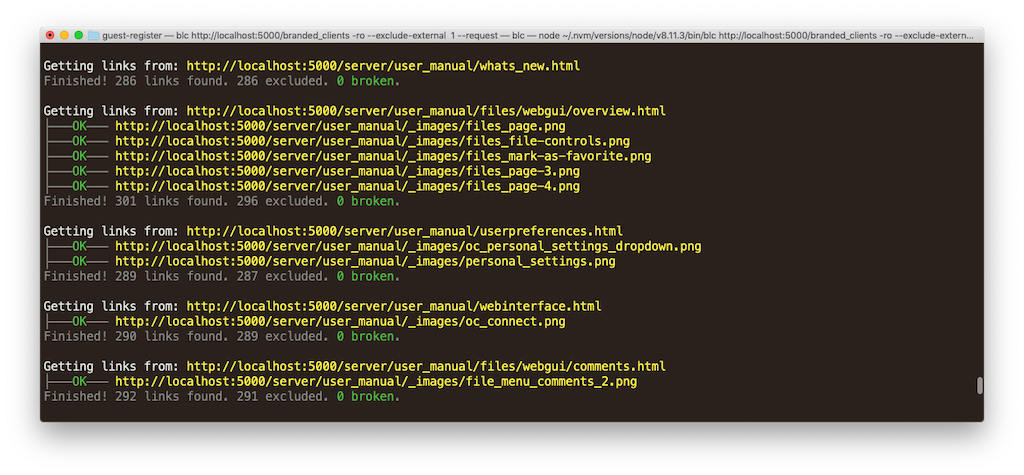
In this next example, I’m going to check only internal links.
blc http://localhost:5000 -ro --exclude-external
Remember the final report output printed in the first run?
Well, take a look at the time taken for this reduced search.
Far quicker.
No?
Finished! 78796 links found. 77952 excluded. 0 broken.
Elapsed time: 55 seconds
Scan Only a Single Page
Now, it’s great that we can scan an entire site (or sub-section of a site), and even limit the search to internal or external links.
However, what if we want to scan a single page, without following the links from that page, wherever they may go?
For example, say that we want to integrate Broken Link Checker into our build pipeline and only scan links in the pages that changed in a feature branch.
To do that, we’d remove the -r option (or the longer --recursive option), as in the following example.
blc http://localhost:5000 -o
Doing so gives us a much quicker — and much shorter — report – but one without a final summary.
Here’s some example output:
Getting links from: http://localhost:5000/
├───OK─── http://localhost:5000/assets
├───OK─── http://localhost:5000/branded_clients
├───OK─── http://localhost:5000/desktop
├───OK─── http://localhost:5000/server
├───OK─── http://localhost:5000/404.html
├───OK─── http://localhost:5000/sitemap-branded_clients.xml
├───OK─── http://localhost:5000/sitemap-desktop.xml
├───OK─── http://localhost:5000/sitemap-server.xml
Exclude Certain Directories and Files
If you’d seen the entire output from the first two scans, you’d have seen that Broken Link Checker ended up searching the static assets directory as well as the sitemap files that Antora generates.
There’s no point in scanning those.
So let’s exclude them from the scan, by using the --exclude option.
This option takes a glob to match files and directories against.
If you’ve never heard of a glob before, globs are a form of pattern matching, commonly used in Linux shells to find (or exclude) files and directories.
Once you’re comfortable with them, the can significantly simplify searches.
To exclude the assets directory and the sitemap files, I’ll use the --exclude option twice, as in the following example:
blc http://localhost:5000 -ro \
    --exclude-external \
    --exclude /assets \
    --exclude sitemap*.xml
The first call excludes anything in (or under) the top-level assets directory.
The second call excludes any file starting with sitemap and ending with .xml.
You can read more about globs on The Linux Documentation Project.
But, You Cannot Control The Timeout
While Broken Link Checker is a convenient tool — and does an excellent job — there’s no -t or --timeout option.
This isn’t a deal-breaker by any means, but it can lead to scans taking quite a long time, such as up to 15 minutes in the first example if requests need to timeout.
An issue has been reported in the project’s GitHub repository.
There, you see that:
The timeout is defined by the operating system and is usually 20,000ms
And while you can change at the operating system level, it’s not something you can do for each scan.
The last activity on the issue was on the 16th of August, 2017, so I don’t see this being implemented any time soon.
That said, while it’d be great to have this functionality, I can live without it, at least for the time being.
Getting Help
As with any command, you’ll need to refer to its documentation many times over.
To do that, pass the --help switch, as in the following example.
blc --help
This displays all of the available options (both short and long), along with default options, and a description for each option.
In Conclusion
As you may have guessed by now, I’m sold on Broken Link Checker.
It’s easy to install, quick to run, and quite configurable.
However, I’m sure that it’s far from the only tool for this task.
What tools do you use to check for broken links in your code documentation?
Would you recommend them?
If so, why?
Please share your thoughts in the comments.
## Other Parts In This Series


Join the discussion
comments powered by Disqus